Eletechsup Original Factory Official Store
433Hz 12V RF Adjustable Delay timer Wireless Remote Control Relay Switch 1TX+3RX
433Hz 12V RF Adjustable Delay timer Wireless Remote Control Relay Switch 1TX+3RX
Couldn't load pickup availability

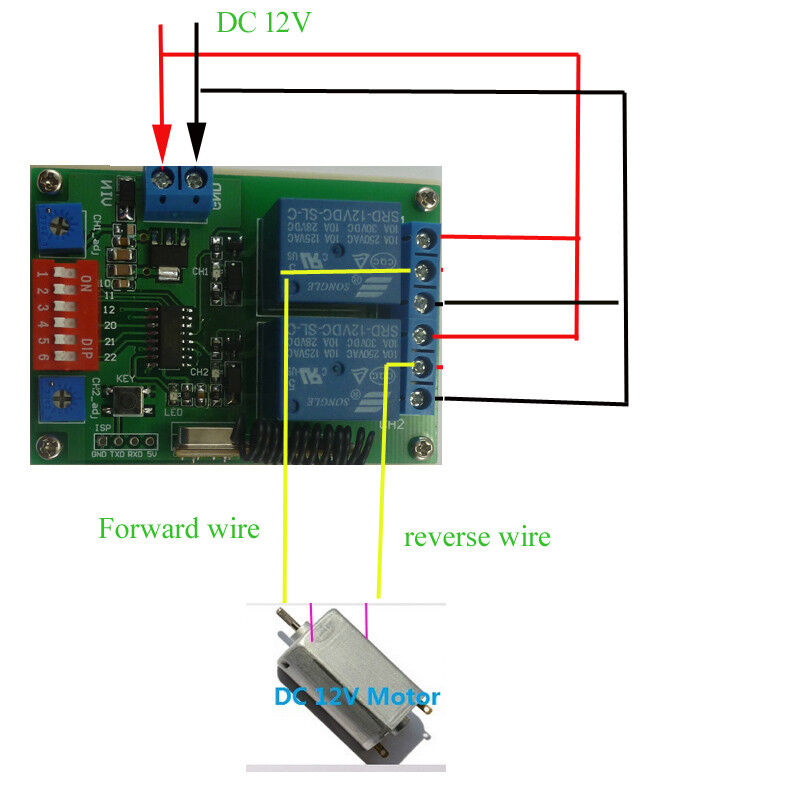
Wiring Diagram 2:
DC 1-48V OR AC 85-265V control circuit,Wiring diagram below(Note:If not DC 12V load, need another DC 12V power supply). "LOAD" may be LED lights, fans, motors and other DC AC equipment

1 Operating voltage: DC 9-13V (recommended DC 12V , 5V version can be customized if conntact )
2 Operating Current: All relays close,about 14MA; one relay open,about 43MA;two relay open,about 71MA
3 Operating frequency: 433.92MHz (315M version can be customized)
4 Receiver sensitivity : -108dBm
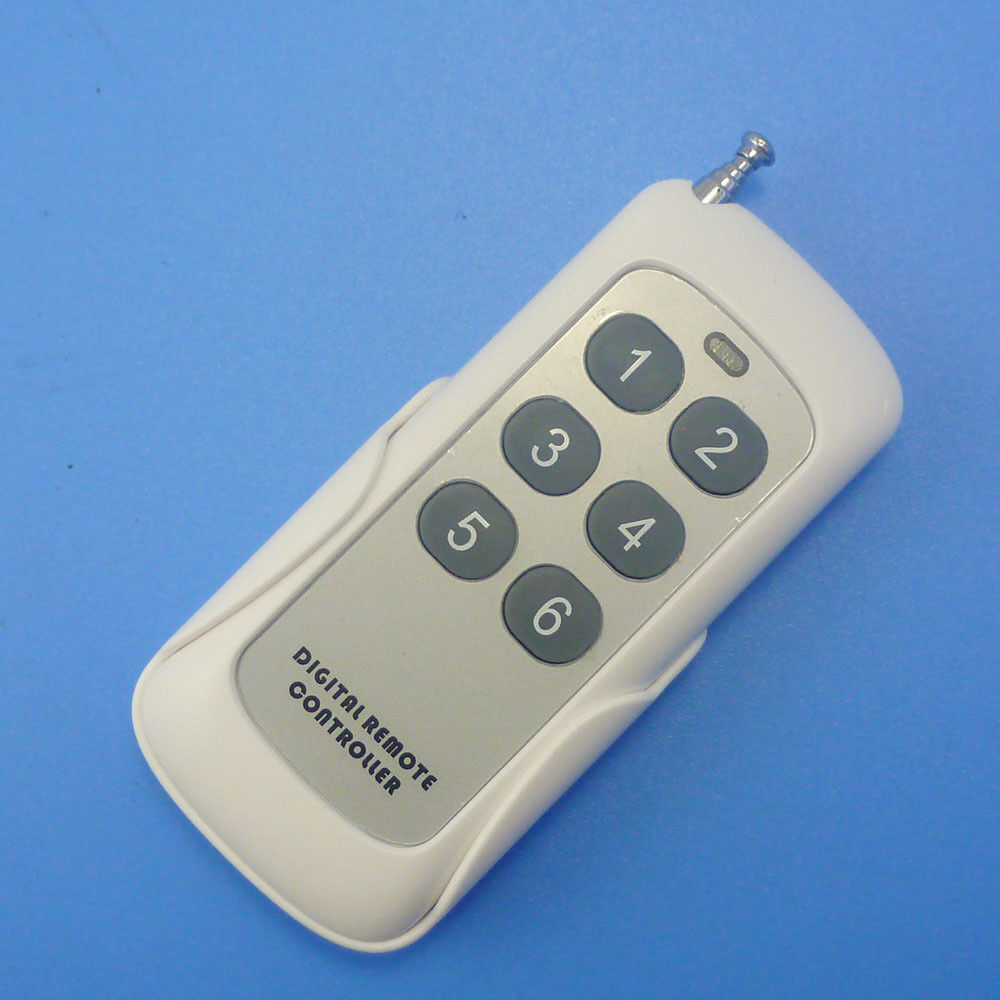
5 Decode : learning code, can be adapted EV1527 / PT2262(Click here)and compatible remote control, you can store up to 16 remote control
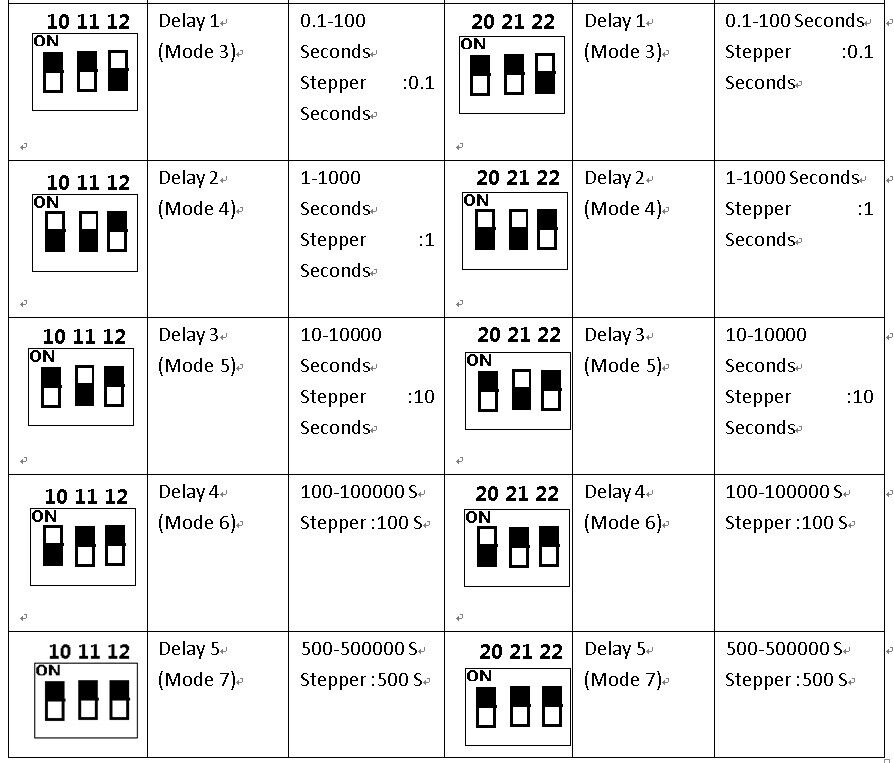
6 Work mode : Non-locking (Momentary is defult),Self-locking (Toggle),Inter-locking (Latch), Delay;Each channel independently set the Work mode; 500,000 seconds maximum delay
7 Size(Including housing): 75*54*28mm;
8 Relay Maximum load(Recommended<5A):10A/250VAC,10A/125VAC,10A/30VDC, 10A/28VDC ,10A/12VDC .
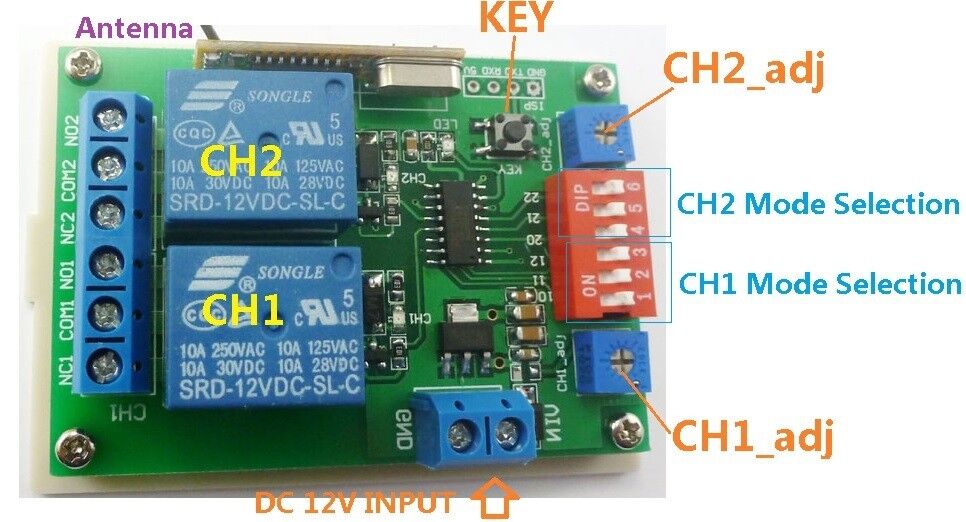
1: Receiver Mother board have a learning key , if the remote is lost , must buy EV1527 OR Pt2262 remotes to re-learn;


1: Each Channel have 4 working mode : Delay time , Toggle mode (singnal Self-locking), Momentary Mode ( singnal None-locking) , Latch mode (singnal Inter-locking) .
2: working mode of each channel need to be set individually , 2 channels can have 10 different working mode combinenatoin ,
Detail :
one channel is Momentary , the other channel is Latch ;
one channel is Momentary , the other channel is Momentary ;
one channel is Momentary , the other channel is Toggle ;
oone channel is Momentary , the other channel is Delay time ;
one channel is Toogle , the other channel is Delay Time ;
one channel is Toogle , the other channel is Latch ;
one channel is Toogle , the other channel is Toggle ;
one channel is Latch , the other channel is Delay Time ;
one channel is Latch , the other channel is Latch ;
one channel is Delay time , the other channel is Delay Time ;
3: Time of each delay mode is proportionally increased. For example, you want to channel 1 to delay 50 seconds , 500seconds and 5000 seconds, you can first seting channel 1 is set to "delay 1 (Delay Mode 3), turn around (CH1_adj) adjustable resistance, so that channel 1 delay 50 seconds; if the mode is set to "delay 2 (mode 4), the delay time becomes 500 seconds, if the mode is set to" delay 3 (mode 5), the delay time becomes 5000 seconds
4 With a suitable screwdriver and gently rotating adjustable resistance;Clockwise, increasing delay,Counter-clockwise, the delay is reduced
NO : Relay normally open contact
COM : Relay common contact
NC : Relay normally closed contact
Open : NO connection COM, NC disconnect COM
Close : NO disconnect COM, NC connection COM
Momentary : Press the Transmitter button A, the receiver Channel 1 is Open, release button A; the receiver Channel 1 is Close, the same as B ,Every Channel is Independent ;
Toggle : Press transmitter button A for 1 time , the receiver Channel 1 is Open, press button A again, the receiver Channel 1 is Close, the same as B. Every Channel is Independent ;
Latched : Press transmitter button A, the receiver Channel 1 is Open, the Channel 2 is Close.
Press transmitter button B, the receiver Channel 2 is Open, the Channel 1 is Close.
Delay : Press the Transmitter button A, the receiver Channel 1 is Open,After a set time delay, the receiver Channel 1 is Close, the same as B ,Every Channel is Independent;
If during the delay, press the button of Transmitter, delay start again; if the delay period, press and hold the button of Transmitter 3-4 seconds, the receiver controller stops the delay, the relay Close
Under normal operating mode, LED will be lit, when receives a valid remote control (EV1527 / PT2262) button values, LED flashes
Clean code: press the button and held down, LED off, LED will light about 8 seconds later, clean code is completed (Note: After performing clean code previously stored remote control value does not exist)
Step 1 (into the learning mode): Press the button (about 1 second), LED off;
Step 2 (adapter channel 1): Then press the first button on the remote control, LED flashes four times off, then learning the first button value
Step 3 (Adaptation Channel 2): Then press the second button on the remote control, LED flashes four times brighter, then learned two key values
Features / Specifications :
Technical Data :