Eletechsup Original Factory Official Store
AK029 DC12V 2ch Relay Wireless RF Remote Control provide Ardino MEGA2560 PRO code
AK029 DC12V 2ch Relay Wireless RF Remote Control provide Ardino MEGA2560 PRO code
SKU:AK029*2+BX003*1
2000 in stock
Regular price
$28.48
Regular price
$28.48
Sale price
$28.48
Unit price
per
Couldn't load pickup availability
Product Name:DC12V 2ch Relay Wireless RF Remote Control provide for Arduino UNO MEGA2560 PRO code
We provide for ARDUINO sample code , please contact after your order at Ebay message .
DIY Kits No.: RT322
Qty:
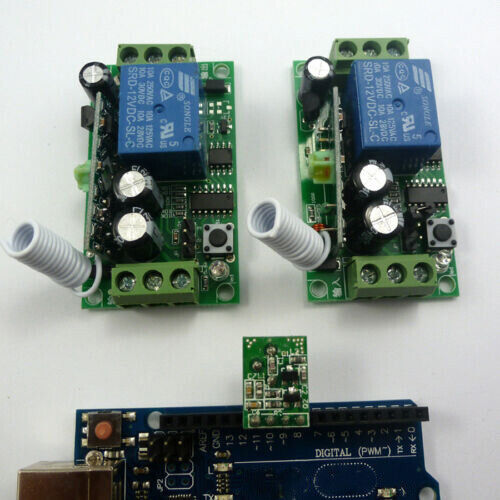
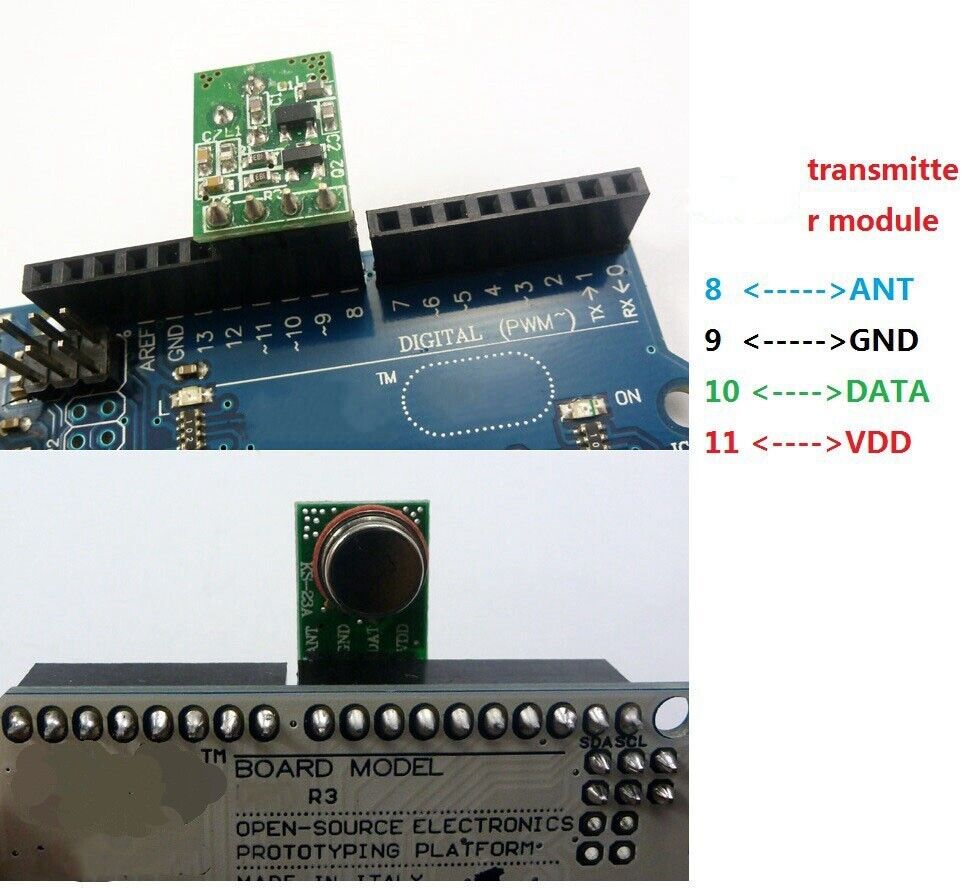
1 PCS 433M Wireless transmitter module(Does not include Arduino UNO);
2 PCS 433M 1 channels relay switch;

Software control:
How to use:send "a" trigger A channel relay,send "b" trigger A channel relay,Etc.
arduino core fragment(complete code through ebay message Request):
//Author: cantone-electonics
//Arduino 1.0
//Arduino uno R3
//Making a wireless remote control with arduino
const int data_out = 2;//encoder DOUT
//LED pin,When receiving the key from the serial port, LED flash
const int ledPin = 13; //LED pin
// OSC Resistance is 3.3M
const int Osc_4xCycle = 359; //4 oscillating time periods
const int Osc_12xCycle = 1078;//12 oscillating time periods
unsigned long Temporary[3];//Temporary storage unit
...
//send:8 Address Bits, 4 Data Bits, Sync bit
void send_data()
void setup() {
// initialize the LED pin as an output:
pinMode(ledPin, OUTPUT);
// initialize the encoder DOUT pin as an output
pinMode(data_out, OUTPUT);
Serial.begin(9600);
}
void loop()
{
...
while(1)
{
//get key from pc serial port
while (Serial.available() > 0)
{
keydata = Serial.read();
receive_flag = 1;
delay(2);
}
if(receive_flag == 1)//if get key,send key
{
receive_flag = 0;
if((keydata == 'a') || (keydata == 'A'))//trigger A channel relay.
{
Temporary[2] = 0xC0;// 0xC0 is A button key
digitalWrite(ledPin, HIGH);//Turn on led
send_data();//send code word
Serial.println(".....trigger A channel relay.....");
}
else if((keydata == 'b') || (keydata == 'B'))//trigger B channel relay.
{
Temporary[2] = 0x30;// 0x30 is B button key
digitalWrite(ledPin, HIGH);//Turn on led
send_data();//send code word
Serial.println(".....trigger B channel relay.....");
}
else if((keydata == 'c') || (keydata == 'C'))//trigger C channel relay.
{
Temporary[2] = 0x0C;// 0x0C is C button key
digitalWrite(ledPin, HIGH);//Turn on led
send_data();//send code word
Serial.println(".....trigger C channel relay.....");
}
else if((keydata == 'd') || (keydata == 'D'))//trigger D channel relay.
{
Temporary[2] = 0x03;// 0x03 is D button key
digitalWrite(ledPin, HIGH);//Turn on led
send_data();//send code word
Serial.println(".....trigger D channel relay.....");
}
...
}
}
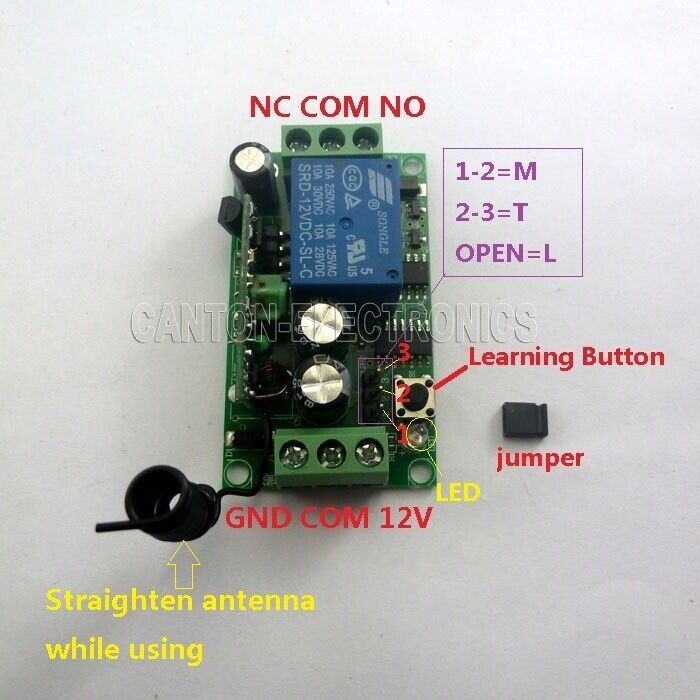
Output:

A.singnal Inter-locking (Latch)----connect 2 and 3 ;
B.singnal Self-locking (Toggle) ---- connect 1 and 2 ;
C.singnal Non-locking (Momentary ) ---- All disconnect ;
· Toggle : Press->On; Press again->Off ;
· Latched : Press->On; Press other button->Off ;
· Momentary : Press and hold->On; Release->Off ;
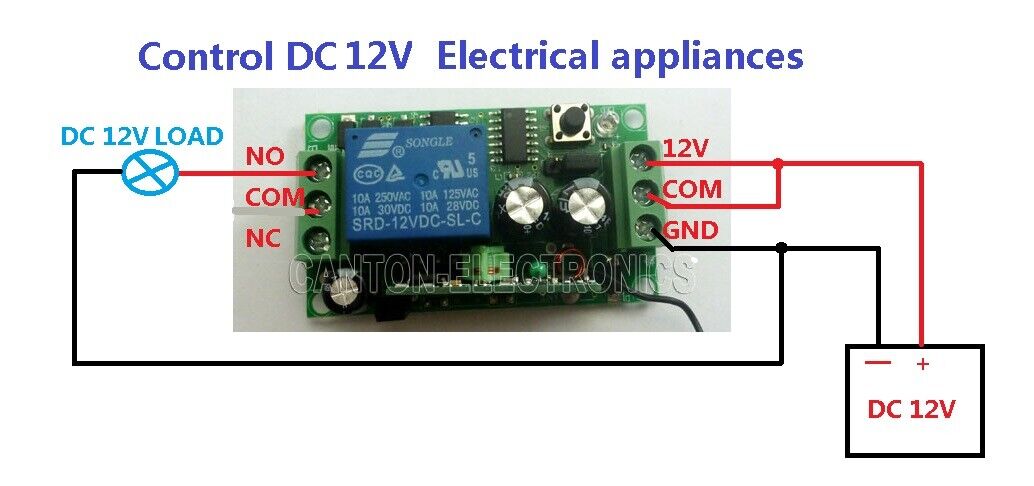
Wiring Diagram 1:
DC 12V control circuit,Wiring diagram below. "LOAD" may be LED lights, fans, motors and other DC 12V

Wiring Diagram 2:
DC 1-48V OR AC 85-265V control circuit,Wiring diagram below(Note:If not DC 12V load, need another DC 12V power supply). "LOAD" may be LED lights, fans, motors and other DC AC equipment