Eletechsup Original Factory Official Store
Master USB TO TTL232 Wireless Transceiver UART Serial Port for Arduno R3
Master USB TO TTL232 Wireless Transceiver UART Serial Port for Arduno R3
SKU:RT39D01+RT6AF02
11 in stock
Regular price
$21.32
Regular price
$21.32
Sale price
$21.32
Unit price
per
Couldn't load pickup availability
Product Name: 2.4G ISM Band GFSK FSK Wireless Transceiver USB/TTL Module with IPEX Antenna for Arduino UNO MEGA2560 Raspberry pi STM32 FPGA
Packing list:
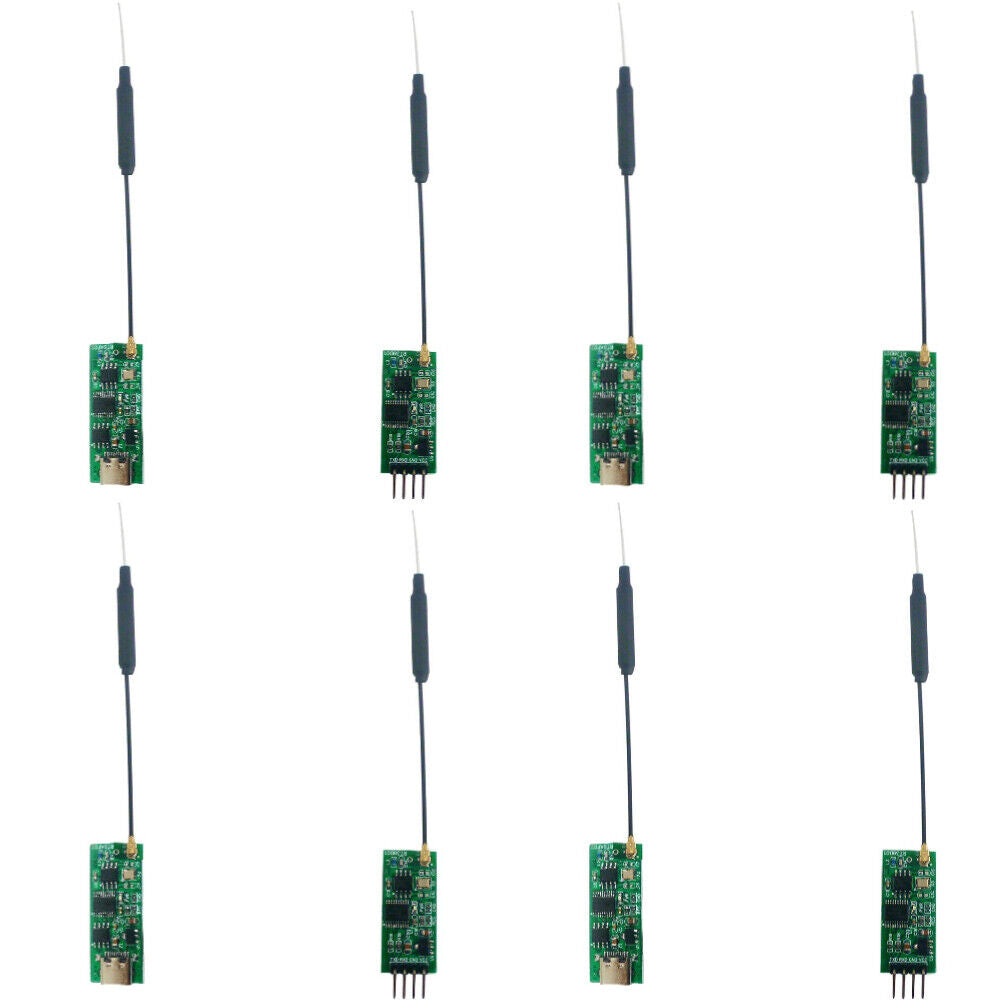
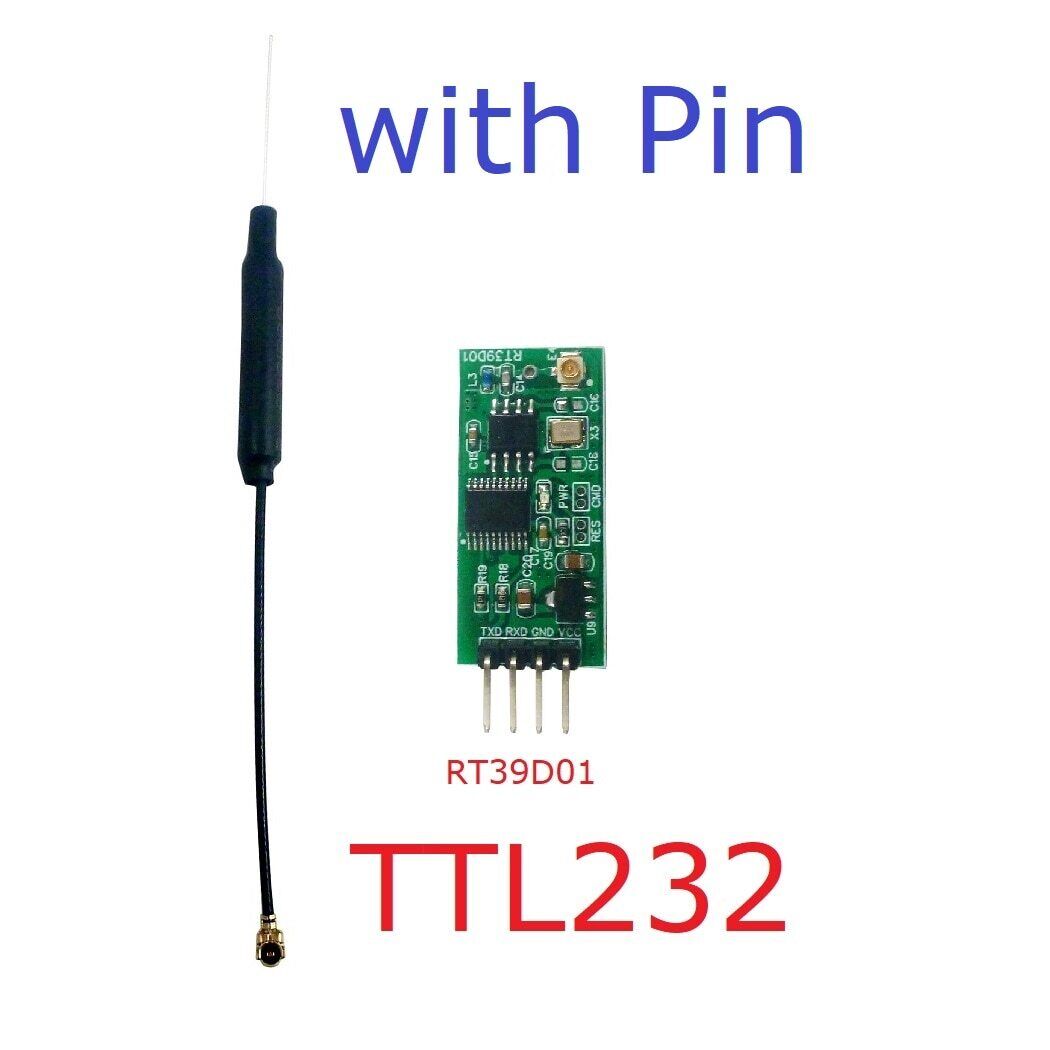
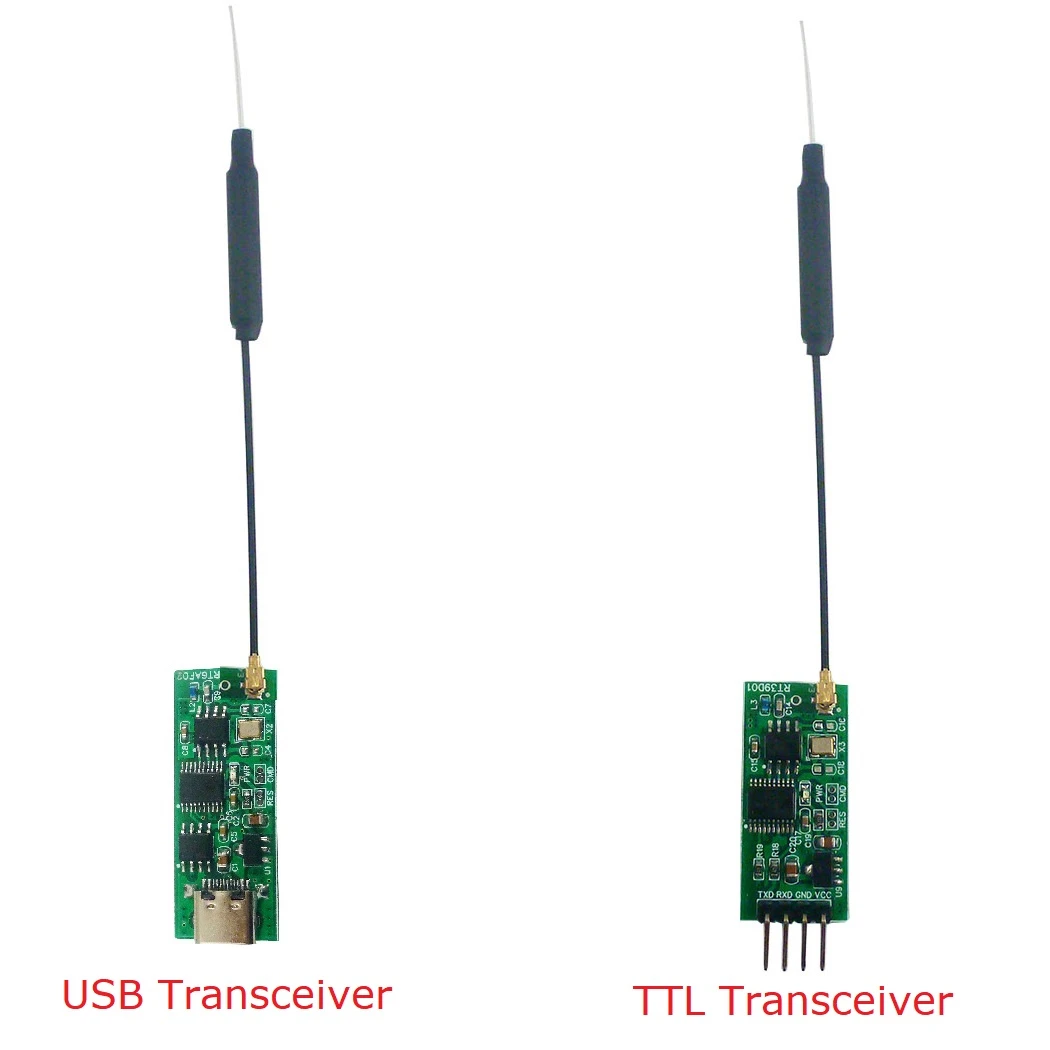
1 pcs RT39D01 2.4G TTL Wireless Transceiver Module
OR 1 pcs RT6AF02 2.4G USB Wireless Transceiver Module
OR Kit
(Package does not include UNO-compatible board)
(Package does not include UNO-compatible board)
Overview:
RT6AF02/RT39D01 is a USB/TTL Wireless Transparent Data Transmission Module based on 2.4GHz frequency band, using CI24R1 chip.
The module supports basic AT Commands: Baudrate, Parity bit, ID Number, Version Information, Transmit Power, Frequency Band, Acknowledge Mode and other function settings and queries.
When the module is in AT Mode, the user can use the serial port to send AT Commands to set the parameters of the module.
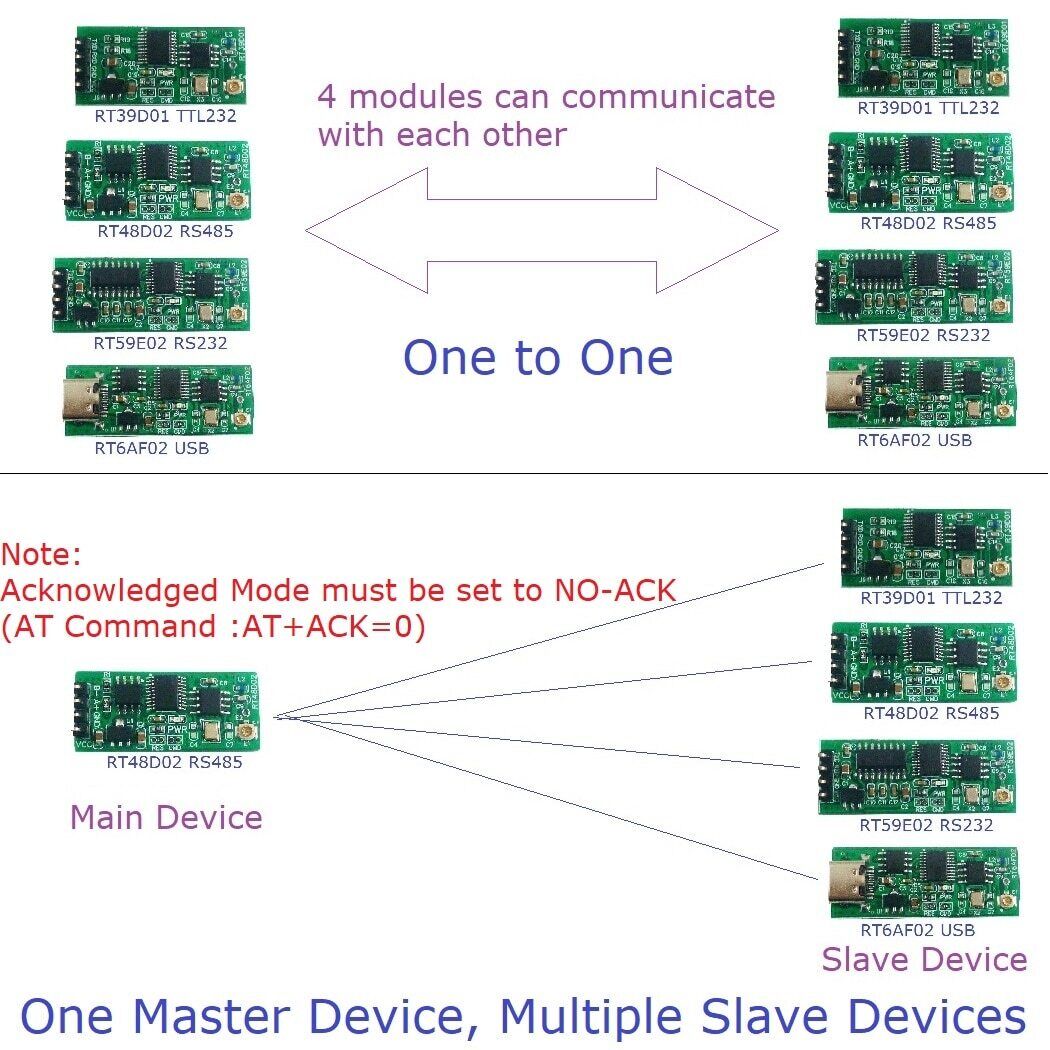
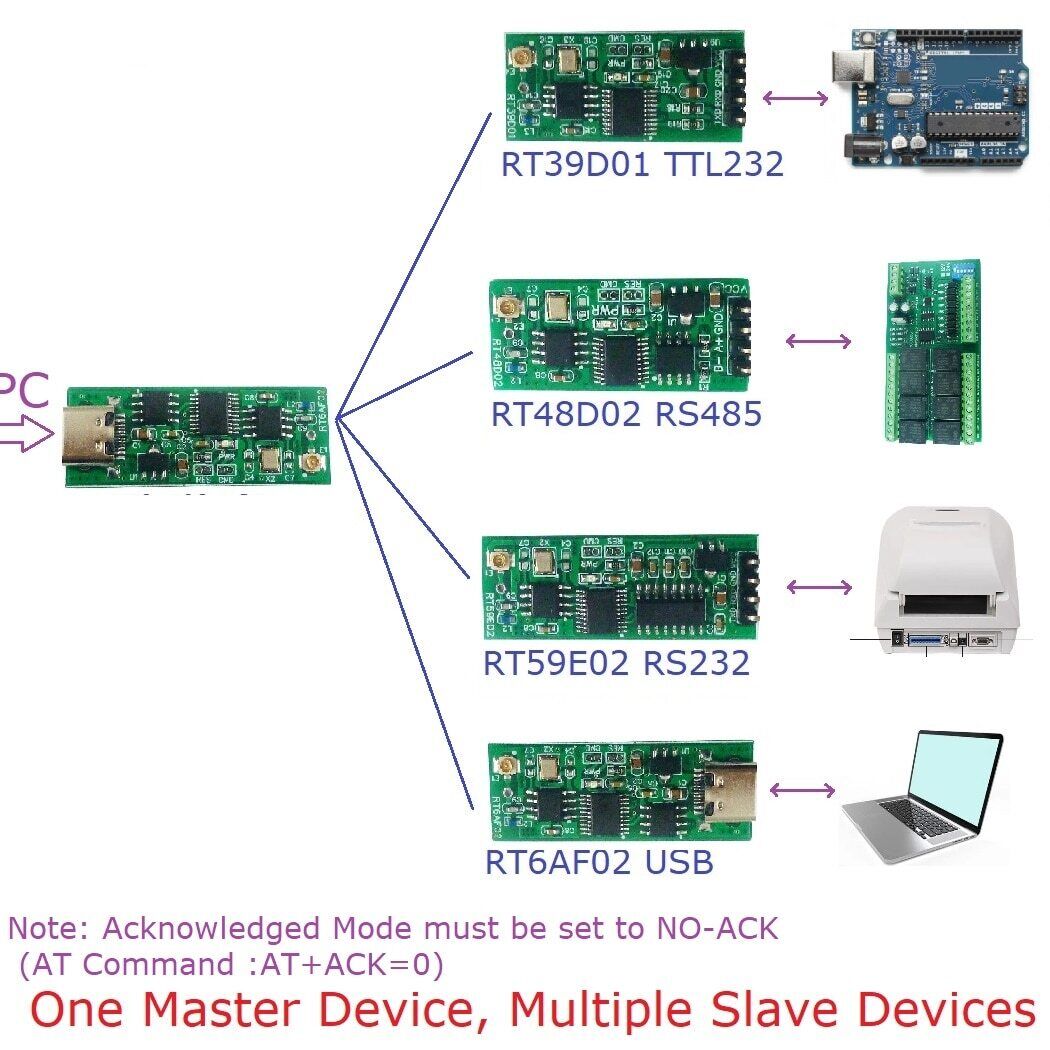
When the module is in transparent data transmission mode, in ACK mode (default), it can be used as a one-to-one transceiver. If it is applied to one-transmit and multiple-receive (master-slave mode), it needs to be changed to NO-ACK mode through AT command
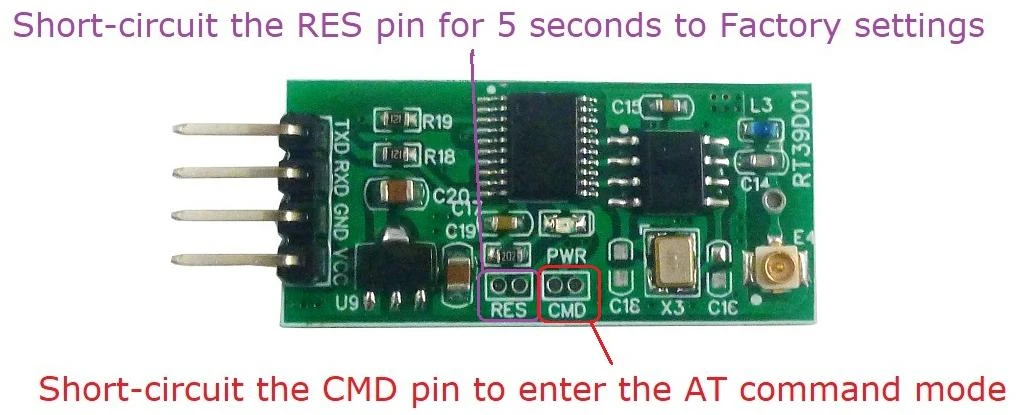
When the CMD port of the AT module is short-circuited, it enters the AT mode. and when it is disconnected, it is the data transparent transmission mode.
When the module is abnormal, short-circuit the two pins of RES on the board for 5 seconds, then power on again to restore the factory settings
The module supports basic AT Commands: Baudrate, Parity bit, ID Number, Version Information, Transmit Power, Frequency Band, Acknowledge Mode and other function settings and queries.
When the module is in AT Mode, the user can use the serial port to send AT Commands to set the parameters of the module.
When the module is in transparent data transmission mode, in ACK mode (default), it can be used as a one-to-one transceiver. If it is applied to one-transmit and multiple-receive (master-slave mode), it needs to be changed to NO-ACK mode through AT command
When the CMD port of the AT module is short-circuited, it enters the AT mode. and when it is disconnected, it is the data transparent transmission mode.
When the module is abnormal, short-circuit the two pins of RES on the board for 5 seconds, then power on again to restore the factory settings
Performance Parameter:
Working voltage: DC 5V-15V;
Frequency range: 2400~2525MHz
Transmission power: 11dBm;
Receiver sensitivity: -84dBm@1MHz;
Working temperature: -40~+85℃;
Baud rate: 1200, 2400, 4800, 9600 (Default), 19200, 38400, 57600, 115200
Open-field transmission distance with sufficient power supply: 80-100 meters
Size: 33 x 15 x 3mm(TTL Version),40 x 15 x 3mm(USB Version)
Weight:2.5g(TTL Version),3g(USB Version)
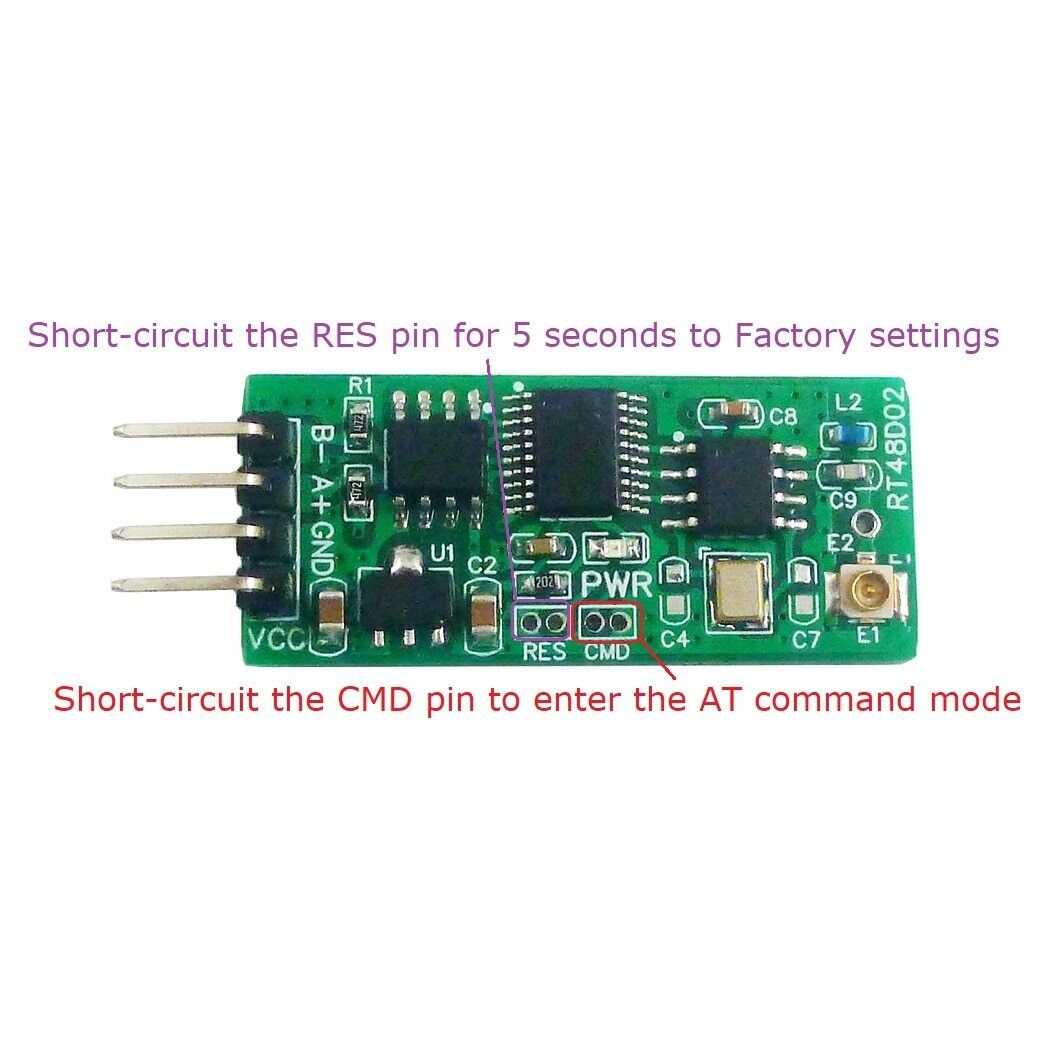
Pinout(TTL Version) :
1 VCC: DC 5V~15V positive power supply;
2 GND: power ground
3 RXD: TTL RXD data
4 TXD : TTL TXD data
5 CMD: AT mode switch port
6 RES: Factory reset port
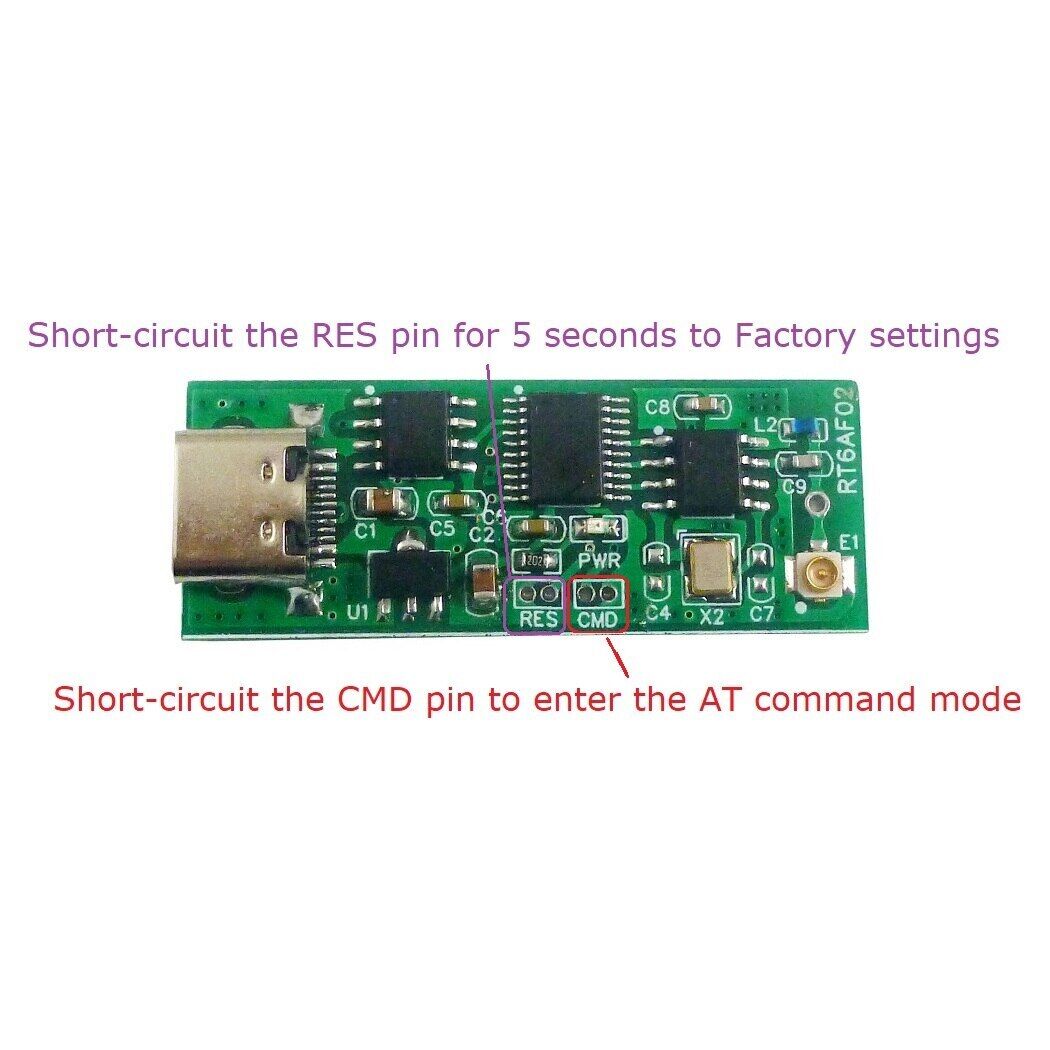
1 TYPE-C USB : USB data and power interface
2 CMD: AT mode switch port
3 RES: Factory reset port
Note: After the two ports of RES are shorted for 5 seconds, the module will restore the factory settings and restart automatically.
2 GND: power ground
3 RXD: TTL RXD data
4 TXD : TTL TXD data
5 CMD: AT mode switch port
6 RES: Factory reset port
Pinout(USB Version) :
1 TYPE-C USB : USB data and power interface
2 CMD: AT mode switch port
3 RES: Factory reset port
Note: After the two ports of RES are shorted for 5 seconds, the module will restore the factory settings and restart automatically.
Power supply description:
The transmit current is 50mA (+11dBm); the receive current is 25mA, please use a small ripple power supply
Note: In order to make the module work stably, it is recommended to use a power supply above 8W (5V/2A (recommended to reduce the transmit power), 6V/2A, 7.4V/1.5A, 9V/1A, 12V/1A)
AT command:
Please refer to the AT command manual below
''RT48D02 RT59E02 RT6AF02 RT39D01 AT command detailed description''
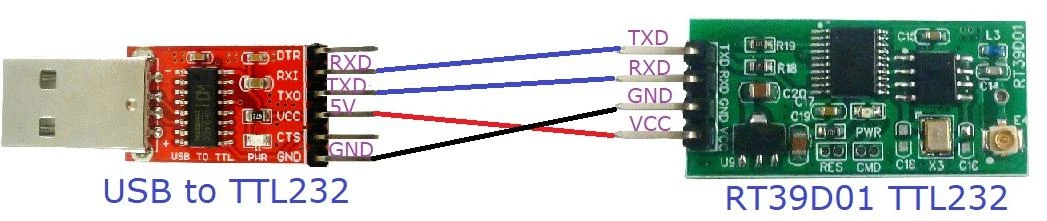
Wiring diagram:
The transmit current is 50mA (+11dBm); the receive current is 25mA, please use a small ripple power supply
Note: In order to make the module work stably, it is recommended to use a power supply above 8W (5V/2A (recommended to reduce the transmit power), 6V/2A, 7.4V/1.5A, 9V/1A, 12V/1A)
AT command:
Please refer to the AT command manual below
''RT48D02 RT59E02 RT6AF02 RT39D01 AT command detailed description''
Wiring diagram:

Typical applications:
2400-2525MHz ISM/SRD band systems
Consumer electronics
Access control, Attendance, Logistics
Smart Furniture
Wireless sensor
Smart Home
Vehicles & Remote Control Toys
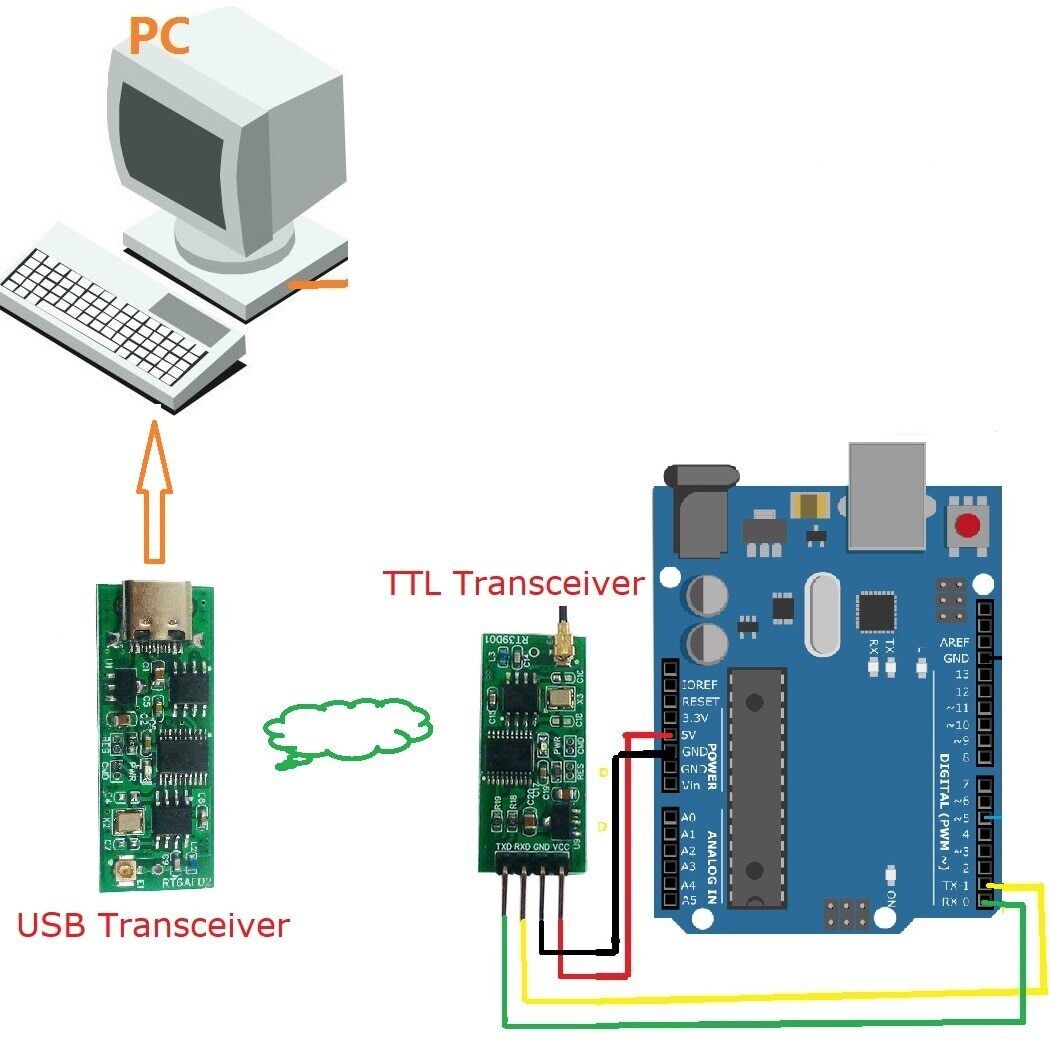
2.4G USB TO TTL Wireless Transmission
2.4G USB TO TTL Wireless Transmission
Application example:
Wireless communication between Ardiuno and PC(Also application with other 3.3V 5V level MCU ,for example: APM APM2 Raspberry pi FPGA CPLD STM32 C8051 PIC AVR MSP430)

Ardiuno IDE Serial data Transceiver:
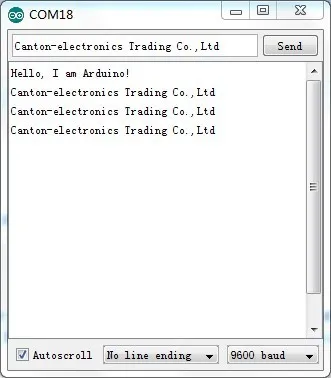
Copy the following code:
//----------------------------------------------------------------------//
// Pin 13 has an LED connected on most Ardiuno boards.
int led = 13;
String comdata = '''';
void setup()
{
// initialize the digital pin as an output.
pinMode(led, OUTPUT);
Serial.begin(9600);
Serial.println(''Hello, I am Ardiuno !'');
}
//Serial data transceiver
void loop()
{
while (Serial.available() > 0)
{
digitalWrite(led, HIGH); // turn the LED on (HIGH is the voltage level)
comdata += char(Serial.read());
delay(2);
}
if (comdata.length() > 0)
{
Serial.println(comdata);
comdata = '''';
}
digitalWrite(led, LOW); // turn the LED off by making the voltage LOW
}
//----------------------------------------------------------------------//