Eletechsup Original Factory Official Store
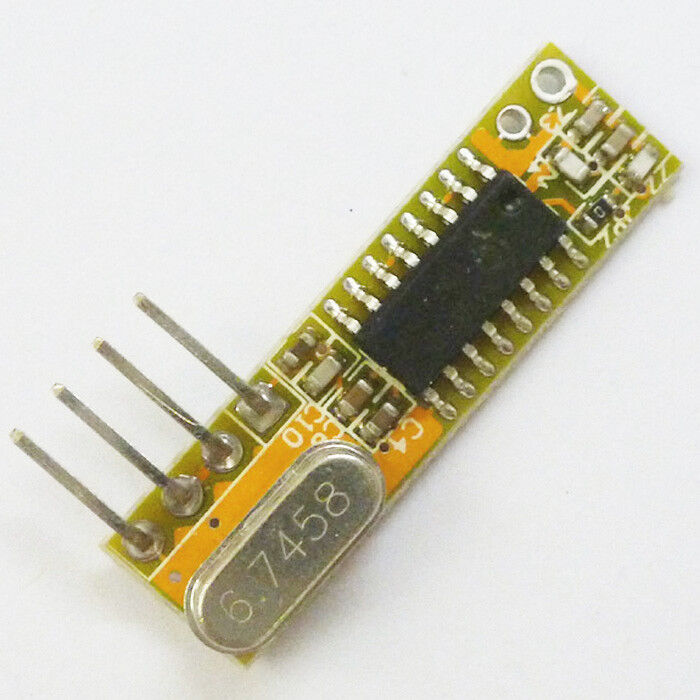
Super Het Remote RX Receiver Module 433HZ -107dBm France IC SYNOXO SYN470R
Super Het Remote RX Receiver Module 433HZ -107dBm France IC SYNOXO SYN470R
SKU:BX007
Low stock: 8 left
Couldn't load pickup availability
Share
Item Description :
High frequency stability ( no adjust components) & coherence;
Very low RF Re-radiation at the antenna;
Operation temperature : -20 ℃ ~ +70 ℃;
Compatable with most AM (ASK/OOK) transmitters ;
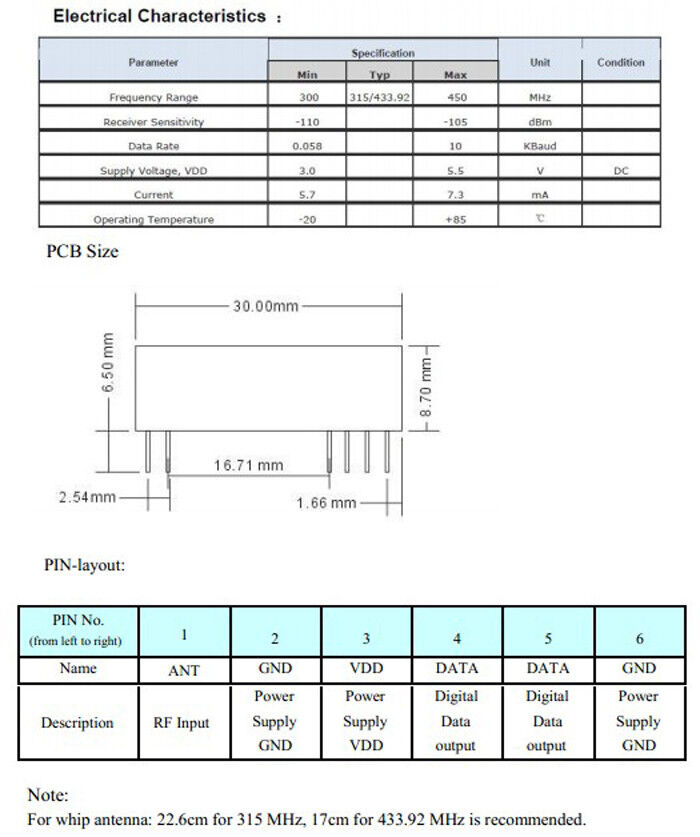
Smal package : SIL-6PIN (2.54 of pin distance);
Library download
Here’s the library you need for this project:
- Unzip the RadioHead library
- Install the RadioHead library in your Arduino IDE
- Restart your Arduino IDE
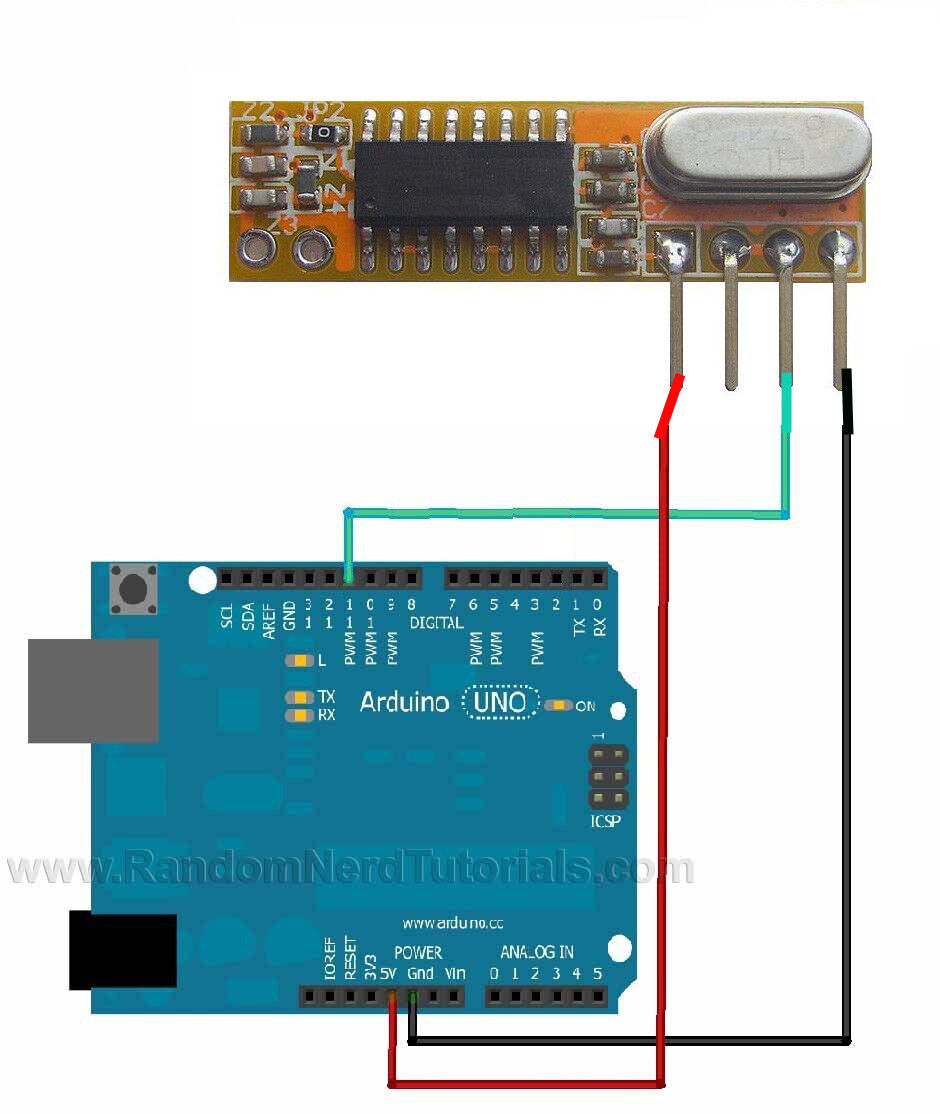
Receiver Circuit
Follow the circuit above for your receiver. Then upload the code below.
#include
Transmitter Circuit
#include
Demonstration
In this project the transmitter is sending a message “Hello World!” to the receiver via RF. Those messages are being displayed in the serial monitor from the receiver. Here’s what you should see in your Arduino IDE serial monitor.
Conclusion
You need to have some realistic expectations when using this module. They work very well when the receiver and transmitter are close to each other. If you separate them too far you’ll loose the communication.